Recommended: VS Code Plugin
The recommended way to install Silq is by using its Visual Studio Code plugin. This approach works for Linux, Mac, and Windows.
Please note that VSCodium also works if you choose to use it, or already have it installed and don’t want to install VS Code. The steps for either IDE are identical.
Install VS Code
First, install the general-purpose editor VS Code by following these
instructions.
Install Plugin
Follow these instructions to install Silq’s VS Code plugin (more details on installing plugins can be found here):
- Open
code - Open the extensions tab (
Ctrl+Shift+X) - Install
vscode-silq
For more details on this plugin, see the extension’s GitHub repository
If there is an issue finding the extension from within VS Code, try these steps:
- Look at the
vscode-silqextension page and click onInstall - Follow the on-screen instructions to open VS Code and install the extension
If that also fails, install the extension manually with these steps:
- Download the extension as a .vsix file by clicking on
Download Extensionunder “Resources” on thevscode-silqextension page - Open the extensions tab in VS Code with
Ctrl+Shift+X - Click on the three dots in the top right corner (…)
- Select
Install from VSIX - Navigate to the
.vsixfile you downloaded and select it
Unicode Input
We additionally recommend you follow our instructions on typing unicode symbols (useful when writing Silq programs).
Start Programming
To start programming, just create a file with extension .slq, and populate it
with code, e.g.:
def main() {
  x:=0:𝔹;
  return H(x);
}
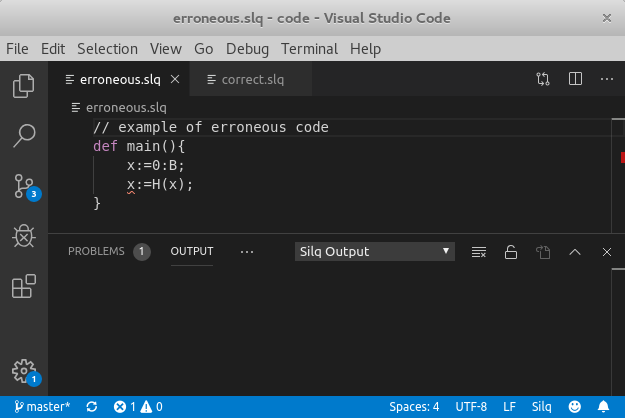
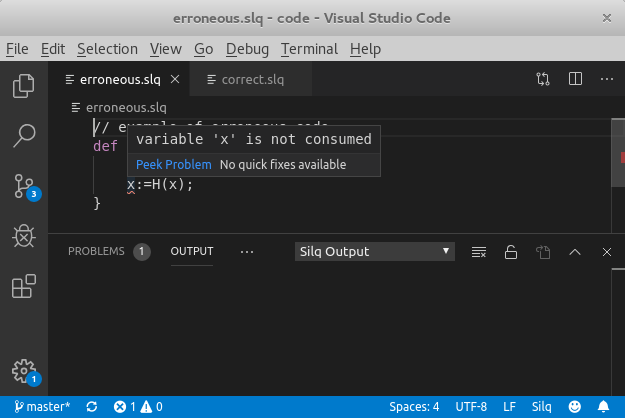
Run Type-Check
Type-checking now happens automatically, on save or on pressing F5:
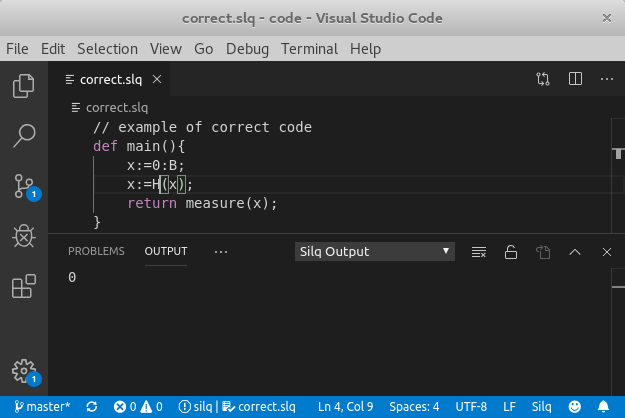
Run Program
Programs with a main function can be run (i.e., simulated) by pressing F5
(see “Silq output” below):
Alternative: Install from GitHub
You can also compile Silq from its GitHub source code: https://github.com/eth-sri/silq.
The following instructions are targeted for Ubuntu, but should also work for other Linux distributions or Mac.
Prerequisites
The following prerequisites are usually already installed on your system. If not, run (on Ubuntu)
sudo apt-get install -y build-essential git wget unzip
Install Silq
Run these instructions to install Silq:
git clone https://github.com/eth-sri/silq.git # clone the repository
cd silq && ./dependencies.sh && ./build.sh # download dependencies and build project
# [ignore compilation warnings]
Now, you can run silq by
/path/to/silq/silq
# (expected) error: no input files
Add Silq to Path
Optionally, you may also add the Silq binary to your path. This enables typing
silq anywhere, regardless of the current directory:
# Typically not needed: create directory
sudo mkdir -p /usr/local/bin
# make sure the current directory is `/path/to/silq`
sudo ln -s $(pwd)/silq /usr/local/bin/silq
Then, you can just run silq anywhere:
silq
# (expected) error: no input files
In the following, we assume you have followed this step. Otherwise, you have to
call silq using its full path, e.g., /path/to/silq.
Run Type-Check
This command type-checks an erroneous program:
# create a file `erroneous` with a type error:
echo "def main(){ x:=H(false); }" > erroneous.slq
silq erroneous.slq # type-check the created file
# Expected error message:
# erroneous.slq:1:13: error: variable 'x' is not consumed
# def main(){ x:=H(false); }
Run Program
This command type-checks a correct program and simulates it:
# Create a correct Silq file:
echo "def main(){ x:=H(false); return measure(x); }" > correct.slq
silq correct.slq # type-check the correct file
# [no output]
silq correct.slq --run # run the correct file
# Outputs 0 or 1